How to Jailbreak iPhone 4S / iPad 2 on 5.0 – 5.0.1 by Absinthe Windows

08:02
How to Jailbreak iPhone 4S and iPad 2 on iOS 5.0 – 5.0.1 by Absinthe Jailbreak for Windows, and it is UnTethered Jailbreak for both iPhone 4S and iPad 2.

If you are a MAC user follow Absinthe Jailbreak Mac Guide.
Note:
Before you continue make sure to do a backup of your device in iTunes as you may lose your Camera Roll during this process.
Windows Greenpois0n Absinthe Jailbreak
Step One
Download the latest version of Absinthe for Windows from here.
Step Two
Double click to extract the downloaded archive and launch the Absinthe application.
Absinthe jailbreak win 0.3
Step Three
As prompted, connect your iPhone 4S to the computer via USB. Make sure to remove any passcodes or VPN settings you’ve previously set.

Step Four
Click the Jailbreak button to begin
Step Five
The application will take you through several steps of the jailbreak: Sending initial data, waiting for reboot, waiting for device to finish booting, Preparing jailbreak data, and Sending payload data.
Step Six
You will be informed that the jailbreak is ‘Almost done’.
Chronic dev A5 iphone 4s - iPad 2 windows
Step Seven
On your device, locate the Absinthe icon and press it to complete your jailbreak. It could be on any homescreen.
Absinthe 0.3
If the server is down and you get an Error establishing a database connection message then tap the Settings icon on your springboard and turn on VPN.
Absinthe jailbreak vpn
You will get a configuration error; however, after about a minute your device will reboot with Cydia on the Springboard!
Absinthe Cydia
Once Finished enjoy with a Jailbroken iPhone 4S and iPad 2 on iOS 5.0/5.0.1

How To: Jailbreak iOS 5 On iPhone 4, iPhone 3GS With RedSn0w 0.9.9b6 [Windows]

02:54
Earlier today we told you that the Dev-Team have updated RedSn0w to version 0.9.9b6. RedSn0w was updated to version 0.9.9b6 to fix various bugs when jailbreaking iOS 5. While a majority of these bugs were mostly specific to users jailbreaking their iPhone 3GS (running the 06.15.00 baseband), the Dev-Team notes RedSn0w 0.9.9b6 provides both functional and cosmetic fixes for jailbreaking the iOS 5 firmware.
Note #1: We recommend jailbreaking iOS 5 with RedSn0w 0.9.9b6 even if you are already jailbroken on iOS 5. If you are going to re-jailbreak your iPhone 4 or iPhone 3GS with RedSn0w 0.9.9b6, just ensure you uncheck the install Cydia option.
Note #2: RedSn0w 0.9.9b6 does not allow you to create custom IPSW files for preserving your baseband. This feature is coming soon.
Note #3: RedSn0w 0.9.9b6 is a tethered jailbreak and does not support jailbreaking the iPhone 4S.
Note# 4: If you would like to update to iOS 5 please click here to follow our detailed guide.

Jailbreak iOS 5 On iPhone With RedSn0w 0.9.9b6

Step 1) Download RedSn0w 0.9.9b6 for Windows from the iJailbreak Downloads Section or using the download mirror below:
Mirror #1: RedSn0w 0.9.9b6 (Windows)
Step 2) Once you have downloaded RedSn0w to your desktop you will need to launch it by clicking the executable file.
Step 3) With RedSn0w up and running you will then click the Jailbreak button.
Step 4) You will come to a screen where you will need to put your iPhone into DFU mode. Read through and follow the instructions presented to you which is to plug in and power off your iPhone and click the Next button.
Step 5) When you click the Next button you will need to follow the instructions presented to you to put your iPhone into DFU mode.
  • Hold down Power (corner) button for 5 seconds.
  • Without releasing the Power button, also hold down the Home (bottom center) button along with the Power button for 10 seconds.
  • Without releasing the home button, stop holding down the power button for up to 15 seconds.
Step 6) After you successfully enter DFU mode RedSn0w will now prepare the jailbreak data. Once RedSn0w is done ensure the “Install Cydia” option is checked and click the Next button.
Step 7) RedSn0w will begin jailbreaking your iPhone. DO NOT interrupt or use your Mac during this time. When your iPhone is finished being jailbroken it will reboot into a jailbroken state.
Optional: Booting Tethered - When you Jailbreak your iPhone on iOS 5 (official version) you will have a tethered Jailbreak. Meaning in order for your iPhone to turn back on you will need to boot it using RedSn0w (this applies every time your iPhone looses power). To do this launch RedSn0w again and click the Extras Button > then click the Just boot button and you will need to put your iPhone into DFU mode again.
You can also follow our how to guide to booting a tethered jailbreak using RedSn0w on Windows by clicking here.
Note: Yes, you need to do this every time your iPhone looses power.
Congrats! You should now have a jailbroken iPhone 4, 3GS on iOS 5 using RedSn0w 0.9.9b6 (for Windows).

Downgrade 4.3.5 to 4.3.3 without SHSH Blobs - iPhone 4, 3GS, iPod Touch 4G, 3G, iPad

02:53
Few weeks ago we showed you how to downgrade from iOS 4.3.5 to 4.3.3 on iPhone 4, 3GS, iPod touch 4G, 3G, iPad 2 (wifi) and iPad 1 with iOS 4.3.3 saved SHSH files. As most of you know that idevices users are interested in downgrading 4.3.5 / 4.3.4 to 4.3.3 to get fully untethered jailbreak.


Many users have upgrading their iOS devices to iOS 4.3.5 without saving 4.3.3 shsh files and others saved 4.3.3 shsh files but failed to follow the guide as they may faced some errors such as 3194, 1600, 1602, 1013, 1015, 20 or 1611.

Anyway we have good news for you, one of our reader was successfully able to downgrade his iPhone from 4.3.5 to 4.3.3 without shsh blobs files.

Downgrade 4.3.5/4.3.4 to 4.3.3 - iPhone 4, 3GS, iPod Touch 4G, 3G, iPad :


Required Downloads :

Downgrade 4.3.5 to 4.3.3 without SHSH blobs files Tutorial :

Step 1: You have to go to C:\Windows\System32\drivers\etc , and replace "HOST" file with the downloaded one in "Restore Files" folder

Step 2: Open redsn0w and jailbreak your device, you can follow this tutorial - Click Here - but you have to point to iOS 4.3.3 instead of 4.3.4.

Step 3: Then the iPhone will stop on the recovery mode.

Step 4: Open Tinyumbrella (can be found in "Restore Files" folder above), then click on your iPhone name at the left then press on Start Tss Server.

Step 5: Open iTunes and restore your iPhone with iOS 4.3.3 firmware (Shift + Restore) then close it.

Step 6: You will find error 1013, at this time you have to use Fixrecovery (can be found in "Restore Files" folder above).

Step 7: Open iFaith (can be found in "Restore Files" folder above) and Save shsh file.

Step 8: Open sn0wbreeze (can be found in "Restore Files" folder above) to create custom iOS 4.3.3 firmware and restore with it. Done.

Note: We have not had a chance to verify this guide, so if you gonna try it, please feed us back, specially iPad 2 users.

Common Errors:
  • If you get  3194, 1600, 1602, 1013, 1015, 20 errors, you can fix it - Click Here.
  • If you get 1611 error, you can fix it - Click Here.

Jailbreak 4.3.5 iPhone 4, 3GS, iPod Touch 4G, 3G, iPad with Redsn0w [Tutorial]

02:50

Jailbreak 4.3.5 iPhone 4, 3GS, iPod Touch 4G, 3G, iPad with Redsn0w [Tutorial]

As you know that Apple has released iOS 4.3.5 to fix security issue. The good news is that some guys have confirmed that current Redsn0w version can jailbreak 4.3.5 iPhone 4, 3GS, iPod Touch 4G, 3G, iPad 1.

As we reported you that this jailbreak is still tethered jailbreak which means that you will need to reconnect your iDevice with computer every time your reboot iDevice.


Jailbreak 4.3.5 iPhone 4, 3GS, iPod Touch 4G, 3G, iPad:

Step 1:
  • Download iOS 4.3.5 for iPhone 4, 3GS, iPod touch and iPad
  • Download iOS 4.3.4 for iPhone 4, 3GS, iPad, iPod touch
  • Download Redsn0w 0.9.8b4 for Windows
  • Download Redsn0w 0.9.8b4 for Mac
  • Download iTunes 10.4 for Windows & Mac
Extract the RedSn0w zip file by double clicking it.
Step 2 : Connect your iPhone to the computer and launch iTunes.

Select your iPhone from the list of devices on the left. Now hold down Option and click the Restore button. Restore is preferred as it won't create any wasted space on your iPhone.


Navigate to the Pwnage folder on your desktop and select the 4.3.5 firmware ipsw. Click the Choose button to continue.


Step 3 : Once iTunes has finished updating your iPhone to the desired firmware open the Pwnage folder on your desktop and launch the redsn0w application from the redsn0w folder we extracted earlier.


Step 4: Once RedSn0w opens click the Browse button


Step 5: Select the 4.3.4 firmware ipsw we placed in the Pwnage folder on our desktop then click Open.


Step 6: Once the firmware has been verified click the Next button to continue.


Step 7: RedSn0w will now prepare the jailbreak data
Step 8: From this window you can select the jailbreak options you would like.

Make sure Cydia is selected and click the Next button to continue


Step 9: Please plug your iPhone into the computer and make sure its OFF then click the Next button


Step 10: RedSn0w will now guide you through the steps to get into DFU mode. Just follow step required


Hold down both the Home button and the Power button for 10 seconds.


Release the Power button and continue holding the Home button until RedSn0w detects the device.


Step 11: Your iPhone will now reboot


Step 12: RedSn0w will then begin uploading the new RAM Disk and Kernel.


Step 13: Once this is complete you will be notified that RedSn0w is done. Click the Finish button. When your iPhone finishes rebooting (5 minutes or so) it will be jailbroken with Cydia on the SpringBoard.


BOOT TETHERED
Once RedSn0w has finished jailbreaking your device you will need to boot it tethered. Rerun RedSn0w and this time select Just boot tethered right now from the list of options instead of installing Cydia.

Downgrade iPhone 06.15.00 Baseband to 05.13.xx (iPhone 3G with Bootloader 5.8 Only)

15:19
An iSpazio reader found a method to perform the baseband 06.15.00 downgrade on iPhone 3G with Bootloader 5.8 In case you updated your iPhone 3G with Baseband 06.15.00 With Redsn0w trick and now wants to go back to stock baseband, following is the guide for you.
Fuzzyband Downgrader detects your bootloader and baseband and downgrade it with a simple click if your bootloader is vulnerable to Fuzzyband . Fuzzyband Downgrader available in Cydia, just refresh your sources and search for Fuzzyband and install the application. But you need to do little more effort with fuzzyband and following are the step by step instructions.
Please Note :
  • Downgrading works from any version greater than 05.13.xx It will put your baseband back at version 05.13.xx which is hackable by ultrasn0w.
  • Downgrading only works on iPhone 3G with 05.08 (5.8) Bootloader from the factory. This is a very limited number of phones that were released in the first few weeks of the 3G production cycle.
  • If you do not know your bootloader then you can run Fuzzyband and it will report the version number for you.
  • iPhone 3GS and large numbers of iPhone 3G aren’t supported by the Fuzzyband, so in case your baseband is updated then wait for Dev team/GeoHot to release any workaround. This may take weeks or months.
This is what you need to have:
  • iPhone 3G Jailbroken
  • Fuzzyband installed via Cydia;
  • afc2add installed via Cydia;
  • iFunBox (for Windows) or DiskAid (for Mac);
  • certificate for use with Fuzzyband Download it HERE
This is what you need to do:

  1. download the certificate from 06.15.00.cert ICE2- HERE;
  2. Install fuzzyband through cydia,
  3. connect the computer to the iPhone 3G,
  4. Start iFunBox and click File, then go to Applications / Fuzzyband.app, drap and drop the file you downloaded (ICE2-06.15.00.cert);
  5. At this point you must disconnect the iPhone from your computer and start Fuzzyband (which you previously installed from Cydia);
  6. in Fuzzyband you will see your current version of the baseband (which should be 6.15) and have the opportunity to downgrade to version 5.13.
  7. Now just click on downgrade baseband, thats it!
Once you have downgraded, Go to Settings –> About, and scroll down to check your Baseband which should now read 05.13.xx. Now just go to cydia and install ultrasn0w, thats it!
But, remember to repeat the same  process if you update your iphone 3g.

Jailbreak 4.3 iphone 4 PwnageTool 4.2

12:53

iOS 4.3 GM has been released for iPhone 4, iPhone 3GS, iPod touch 4G, iPod touch 3G, and iPad. This Gold Master seed of iOS 4.3 comes with new AirPlay features, a faster Safari engine, personal hotspot, and more. If you want to jailbreak iOS 4.3 GM on iPhone 4 then simply follow the step by step instructions posted below using which you will be able to jailbreak iOS 4.3 GM on iPhone 4 using PwnageTool 4.2, tetheredboot utility and Universal Ramdisk Fixer. Before following the steps you will need to have PwnageTool bundle for iOS 4.3 GM, Access to iOS 4.3 GM firmware, PwnageTool 4.2, tetheredboot utility, Universal Ramdisk Fixer, Mac OS X, and iTunes 10.2.


pwnagetool

INSTRUCTIONS

Modify PwnageTool
STEP 1. First you have to download PwnageTool bundle, then you have to extract the .zip folder, within this folder you will find a .bundle file. Now you have to move iPhone 4 bundle iPhone3,1_4.3_8F190.bundle file to your desktop
STEP 2. Now you have to download PwnageTool 4.2 then copy it to /Applications directory. Simply right click on it and then click on “Show Package Contents” as you can see from the below image.
Show Package Contents
STEP 3. Now you have to go to Contents/Resources/FirmwareBundles/ and paste iPhone3,1_4.3_8F190.bundle file in this location.
bundle file
Create Custom Ramdisk for iOS 4.3 Custom Firmware
STEP 4. Now you have to download and install Universal Ramdisk Maker as you can see from the below image. As the Ramdisk in the current version of PwnageTool is broken so it is important. Basically this Universal Ramdisk Maker is used for patching it correctly for iOS 4.3 firmware.
Ramdisk 1
Ramdisk 2
Ramdisk 3
Ramdisk 4
Build iOS 4.3 Custom Firmware
STEP 5. Now you have to download iOS 4.3 GM firmware and then move it to your desktop.
STEP 6. Simply start PwnageTool in “Expert mode” and then choose your iOS Device:
PwnageTool
STEP 7. Now you have to browse for iOS 4.3 GM firmware for your iOS Device as you can see from the below image.
Browse for iOS 4.3 GM
STEP 8. In order to start creating custom 4.3 firmware file simply click on “Build”.
select Build
STEP 9. Now the custom .ipsw file for your iPhone will be created by PwnageTool which will be jailbroken.


ipsw file
STEP 10. Simply quit PwnageTool after creating the custom firmware.
Restore iOS 4.3 Custom Firmware Using iTunes
STEP 11. Now you have to start iTunes and then from the sidebar in iTunes simply you have to click on your iOS device icon. You have to press and hold Left “Shift” button on Windows or “alt” (option) button on Mac and then click on “Restore” button in the iTunes and then you have to release this button.
iTunes
You will be prompted by iTunes to choose the location for your custom firmware 4.3 file. Now you have to select the required custom .ipsw file and then click on “Open”.
STEP 12. Now you have to wait for some time until iTunes installs the new firmware 4.3 on your iPhone. At this time you will be able to see a progress bar on your iPhone screen which indicates that installation progress. Once the installation is completed your iPhone will be jailbroken on iOS 4.3
Boot in Tethered Mode
As we know there is no untethered jailbreak for iOS 4.3 is available so you have to boot it into a tethered jailbroken state. For this you have to use “tetheredboot” utility by following the steps posted below.
STEP 13. First you have to download tetheredboot.zip utility and then extract it on your Mac OS X.
STEP 14. Now you have make a copy of your custom iOS 4.3 GM file then you have to change the extension from .ipsw to .zip then extract it. Within this folder you will find kernelcache.release.n90 and iBSS.n90ap.RELEASE.dfu. You will need these two files.
Now you have to copy kernelcache.release.n90 file, and then copy iBSS.n90ap.RELEASE.dfu files which you have found under /Firmware/dfu/.
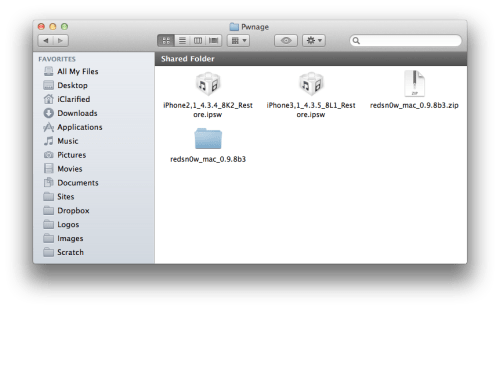
Now you have to move tetheredboot utility and all these files to a new folder named as “tetheredboot” on the desktop as you can see from the below image.
tetheredboot
STEP 15. Now you have to turn off your iPhone and start Terminal on OS X and then simply run the following commands:
sudo -s
Now you have to enter your administrator password, then:
/Users/Max/Downloads/tetheredboot/tetheredboot
/Users/Max/Downloads/tetheredboot/iBSS.n90ap.RELEASE.dfu
/Users/Max/Downloads/tetheredboot/kernelcache.release.n90
Now you have to press enter.
Now you will be asked to enter DFU mode. Simply follow the steps posted below to enter DFU mode:
  • Simply hold Power and Home buttons for ten seconds
  • Now release the Power button but keep holding the Home button for ten more seconds
  • Now your device should be in DFU mode
Now you have to wait for sometime until your iPhone boot, at this point the terminal will show “Exiting libpois0n” message. Your iPhone, iPod touch or iPad will be booted in a jailbroken tethered mode after some time. That’s it. In this way you can jailbreak iOS 4.3 GM on iPhone 4 using PwnageTool. [Via]

Jailbreak PS3 Running 3.55 Firmware [HOW TO]

07:40

How To: Jailbreak PS3 on 3.55 only

STEP 1: Plug a USB stick into your computer
STEP 2: Create a folder in the root of the USB stick called PS3
STEP 3: Create a folder inside the PS3 folder called UPDATE
STEP 4: Download [Mirror] or http://iPhone-Blog.Tk/jailbreak.zip
STEP 5: Unzip Jailbreak.zip to PS3UPDAT.PUP
STEP 6: Move PS3UPDAT.PUP to the directory UPDATE that you just created on the USB stick
STEP 7: Plug the USB stick into your PS3
STEP 8: Navigate to Settings Tab
STEP 9: Choose System Update
STEP 10: Choose Update via Storage Media
STEP 11: It will say it found Version 3.55-jb
STEP 12: Choose OK
STEP 13: Accept Conditions and Install Update
STEP 14: After less than a minute, your PS3 will update, beep 4 times then shut down.
STEP 15: Power up your PS3 (You will have to do it on the console and not by the controller)
STEP 16: Your PS3 is now jailbroken!

How To: Install Packages

STEP 1: Plug your USB stick into your computer
STEP 2: Drop http://iPhone-Blog.Tk/test.pkg into the root of the USB stick [Mirror]
STEP 3: Plug your USB stick into your PS3
STEP 4: Navigate to the Game Tab
STEP 5: Choose Install Package Files
STEP 6: Select the test.pkg
STEP 7: After it installs you will find the test package from geohot installed below the Install Package Files folder
STEP 8: Wait for more packages to be created by the PS3 community

Note: With the above geohot's PS3 jailbreak guide, you won't be able to play backup games or pirated games or whatever you choose to call them. You can install packages with the provided installer. More packages will be coming from the PS3 jailbreak community in the coming weeks and months.